 |
| Paint testing |
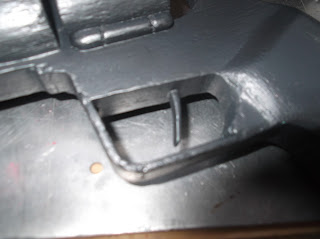
We started by giving it a coat of sealing paint, and then sparying it a dull grey to give the shadows body and cover the white of the previous paint in case of any scratches or scars. Unhappy with the gun-metal greys on offer (either too metal and sharp or too grey and flat) we invested in a new airbrush and mixed up a paint of our own. It turned out to be about half a dark silver metallic paint, a third grey, and a sixth black.
 |
| Shiny new air brush |
This gave us a good gun metal grey to work with, and after giving the whole thing a couple of coats it was looking pretty realistic.
 |
| After one spray round... |
 |
| And then with a lighter finishing coat. |
Given that the client wanted it in wood, the paint and coats of colour added to the smooth finish on the wood, giving a great effect. However, it's meant to belong to a pirate who's been around, so we stippled some lighter and more metallic scratches and grazes onto the corners, barrel and trigger guard as the most likely places to have seen wear and tear.
Having created a good finish on the main body of the gun, we went into the details that make it stand out. The front has three shining red hemispheres in place of a traditional gun barrel, which we moulded out of red clay and then applied a varnish to to give the plastic/sci-fi material look to. The chambers/ammo is a translucent energy, so we used a resin that dries slightly opaic and red, and then backed it with metallic foil; this means that from certain angles the light will make the resin shine and look like it's glowing as it reflects off the metal.
 |
| Pre-finishing the hemispheres in their basic state |
We also had to wrap the handle with hemp-style cord, but couldn't find both a texture and colour that we liked. Thinking caps on again, we chose a cord with the right feel and texture and then mixed up a dye to colour it (while in the jar, no actual branston pickle was used in the colouring :) The ends were sealed to make sure that the wrapping wouldn't unravel and then attached to the handle.
 |
| No pickle was harmed in the colouring of this cord |
 |
| Final Wrapping |
Above: the finished article.
We're now sorted on Ebay and Paypal, so will be Ebaying a series of items soon, starting with our seals. More info soon!
H/F


No comments:
Post a Comment